20 Minute Cozy Thrifted Christmas Wreath Makeover (With Fairy Lights!)
One of the most beautiful parts of the holiday season is the creativity it inspires. Christmas décor doesn’t have to cost a fortune or come straight from a store shelf—in fact, some of the most charming and heartfelt decorations begin as forgotten treasures tucked away in a thrift store. In this final wreath makeover of our Thrifted Christmas Wreath Series, I’m excited to share a transformation that beautifully blends simplicity, creativity, and affordability. With just a few inexpensive additions from Dollar Tree and a spark of inspiration, a worn and outdated wreath becomes a warm, glowing statement piece that instantly elevates your holiday home.
What I love most about thrifted décor is how versatile and forgiving it is. Each piece carries its own history, and when we refresh it with new purpose, we’re not just crafting—we’re preserving, renewing, and giving it a second life. This wreath makeover captures exactly that spirit. By adding layered greenery, festive florals, a Dollar Tree Christmas sign, and a strand of delicate fairy lights, the entire piece comes together with a cozy, timeless charm that feels both classic and custom-made.
In this blog post, I’ll walk you through the process step-by-step. You’ll find the written instructions, before-and-after photos, and two helpful Facebook video tutorials: one showing the full thrifted Christmas wreath makeover and another showing precisely how I added the fairy lights. Whether you’re a beginner or a seasoned crafter, this project is quick, easy, and incredibly rewarding. Let’s bring this beautiful thrifted wreath back to life—and brighten your home with something uniquely yours.
How to Make This Thrifted Christmas Wreath Makeover
Step by Step Video Tutorial
Fairy Lights Tutorial
SUPPLIES USED
- Thrifted wreath
- Dollar Tree Christmas sign
- Dollar Tree Greenery + Christmas florals
- Zip ties
- Fairy lights
- Hot glue
- Drill
- Ribbon or twine for hanging
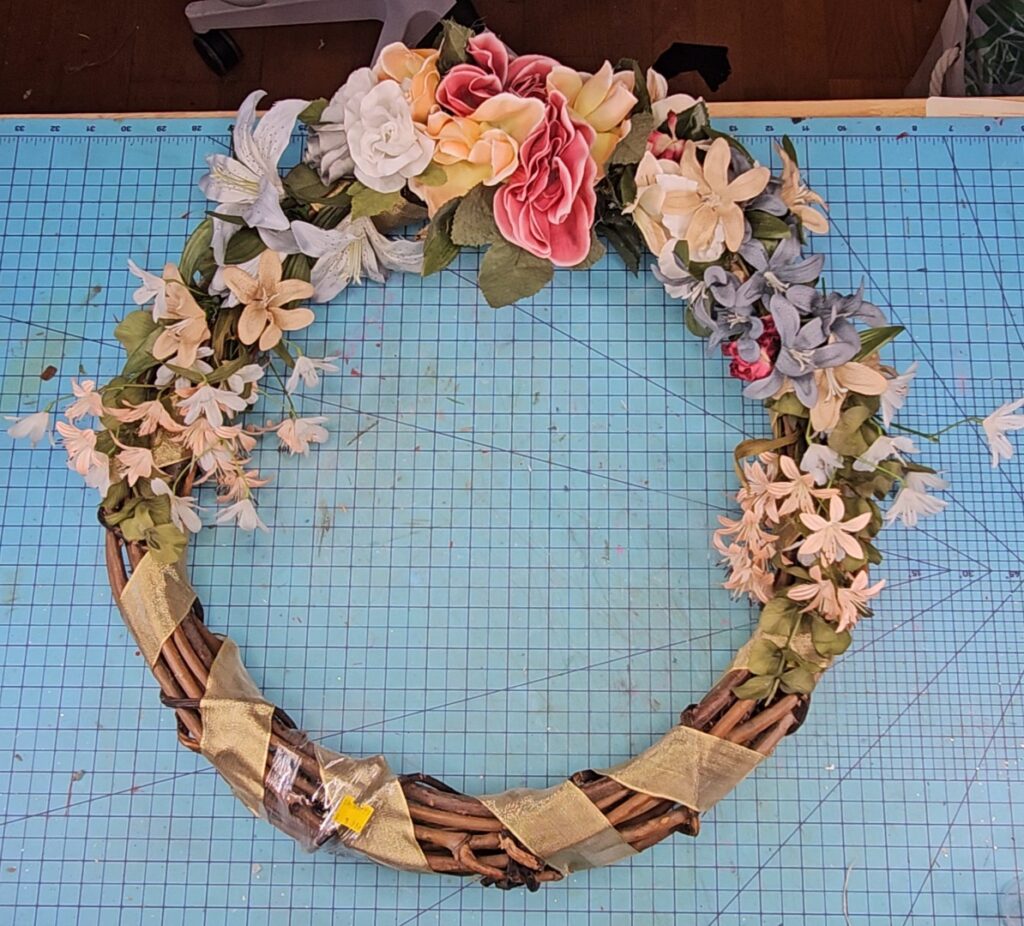
Before and After Photos

Step-by-Step Instructions
- Remove all old florals from the wreath, pulling off any loose pieces and leftover glue for a clean base.
- Take a Dollar Tree Christmas sign and drill two small holes—one at the top and one at the bottom. Use zip ties to secure the sign to the right side of the wreath.
- Add greenery and florals starting at the top of the sign and working toward the left. Repeat from the bottom of the sign toward the left side. Layer until it feels full and balanced.
- Wrap fairy lights into the florals on both the top and bottom. Hot glue the battery pack to the back of the sign, keeping the on/off switch accessible.
- Add string or ribbon to the top of the wreath so you can easily hang it.
There is something so special about transforming an inexpensive thrift store find into a beautiful piece of holiday décor that feels warm, personal, and meaningful. This final thrifted Christmas wreath makeover is a perfect example of how creativity and resourcefulness can turn even the simplest materials into something stunning. With just a few dollars, a few layers of greenery and florals, and the gentle glow of fairy lights, this once-forgotten wreath now shines with a charming Christmas spirit that feels both nostalgic and new.
DIY projects like this are more than crafts—they are moments of calm, joy, and accomplishment during one of the busiest seasons of the year. Whether you’re creating décor for your own home or gifting handmade pieces to loved ones, thrifted flips remind us that beauty doesn’t come from how much we spend, but from the love and creativity we pour into each project. This thrifted Christmas wreath, with its warm lights and festive details, is a wonderful way to welcome guests, brighten your home, and celebrate the magic of handmade holiday décor.
I hope this thrifted Christmas wreath transformation inspires you to look at thrifted pieces with fresh eyes and a heart full of possibility. There are treasures everywhere just waiting for a second chance—and with a little imagination, they can become some of your favorite holiday decorations. Thank you for following along with this Christmas Thrifted Series. I can’t wait to continue crafting with you through every season ahead!
Check out my YouTube channel for more crafting inspiration!
Learn 13 ways to add beautiful texture to any craft! Click here!
Check out my second YouTube channel with tons of kids crafts inspiration!
Want to connect on social media? Click here!
Want to check out my favorite Amazon Finds? Click HERE!
Have fun crafting!
Lianep
** some links are affiliate links which I earn a small commission from at no extra cost to you.