
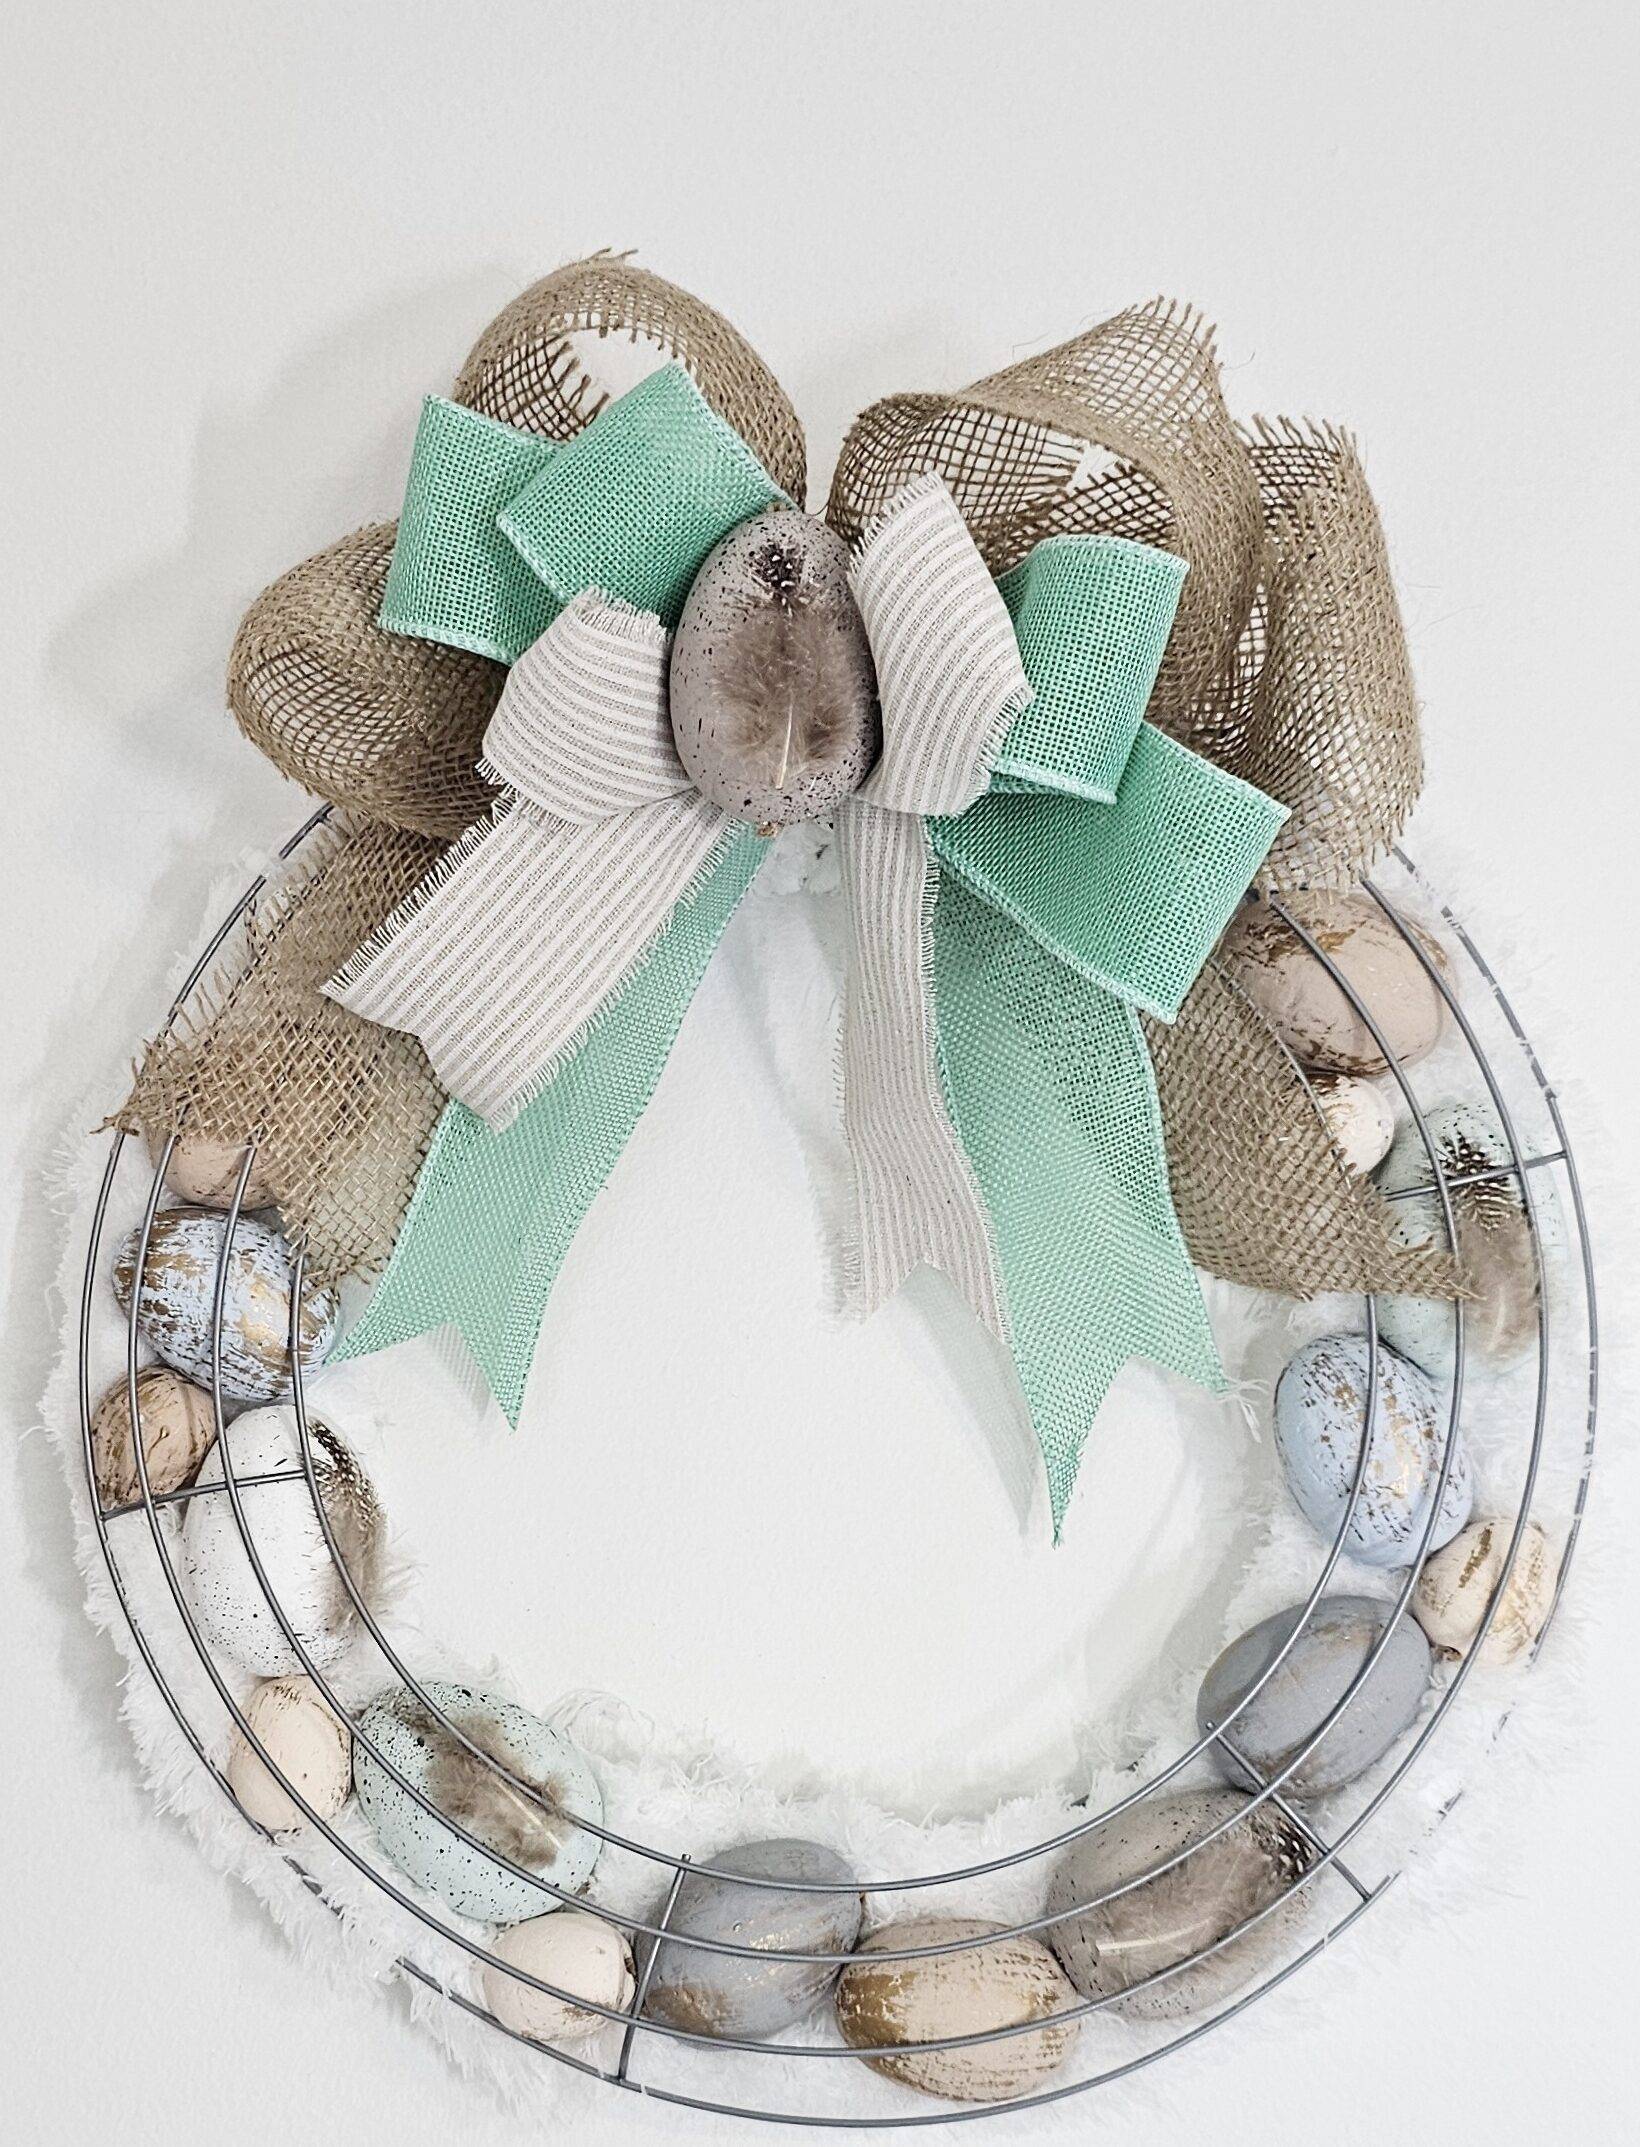
EASY Easter Wreath Using Dollar Tree Finds
Welcome friends! Today I am going to show you how to create a stunning DIY easter wreath using items from the dollar store. This craft is not only budget-friendly, but it’s also perfect for crafters of all skill levels. With just a few simple steps, you can transform inexpensive materials into a beautiful Easter wreath that will add a festive touch to your home decor.
Whether you’re a beginner or an experienced crafter, this project is sure to bring out your creativity and give you a sense of accomplishment. So plug in your glue gun, grab your crafting supplies and lets get creating!
So let’s dive in and create a one-of-a-kind Easter wreath that will impress everyone!
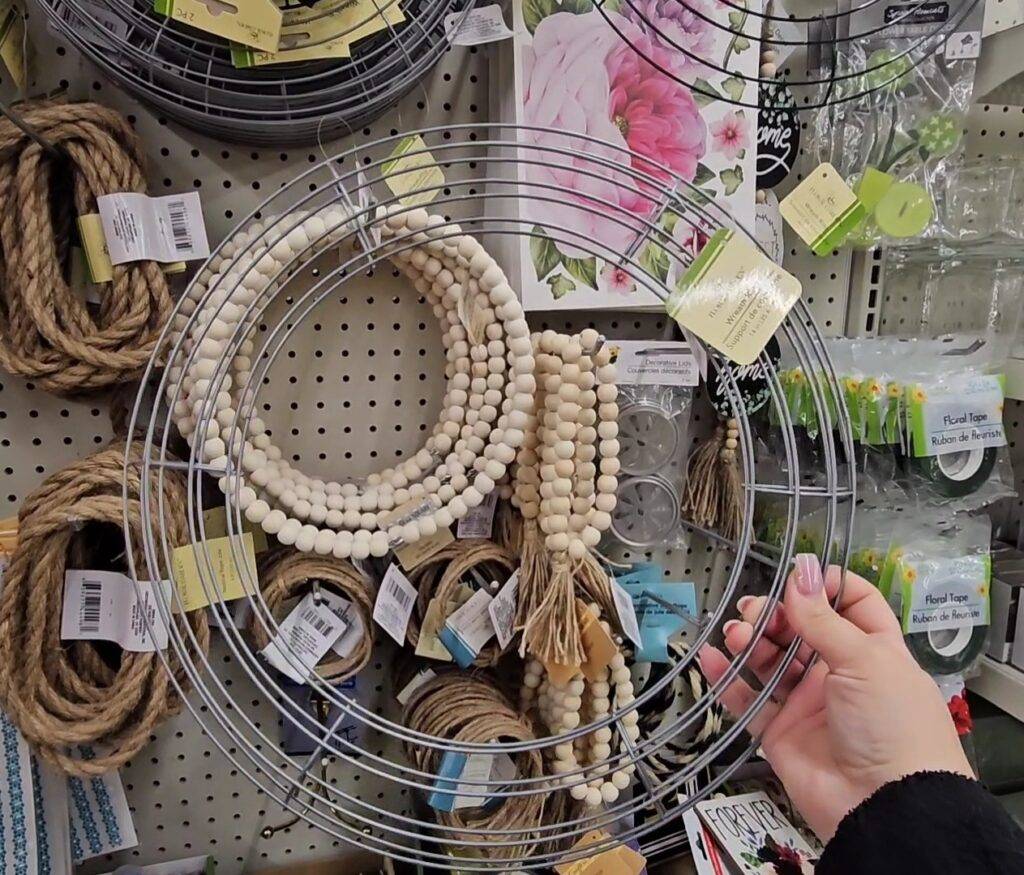
The first thing you will need for this DIY craft are two of these wire wreath forms from the dollar store. You can also find these on Amazon. Dollar Tree also carries black ones, those will work as well.
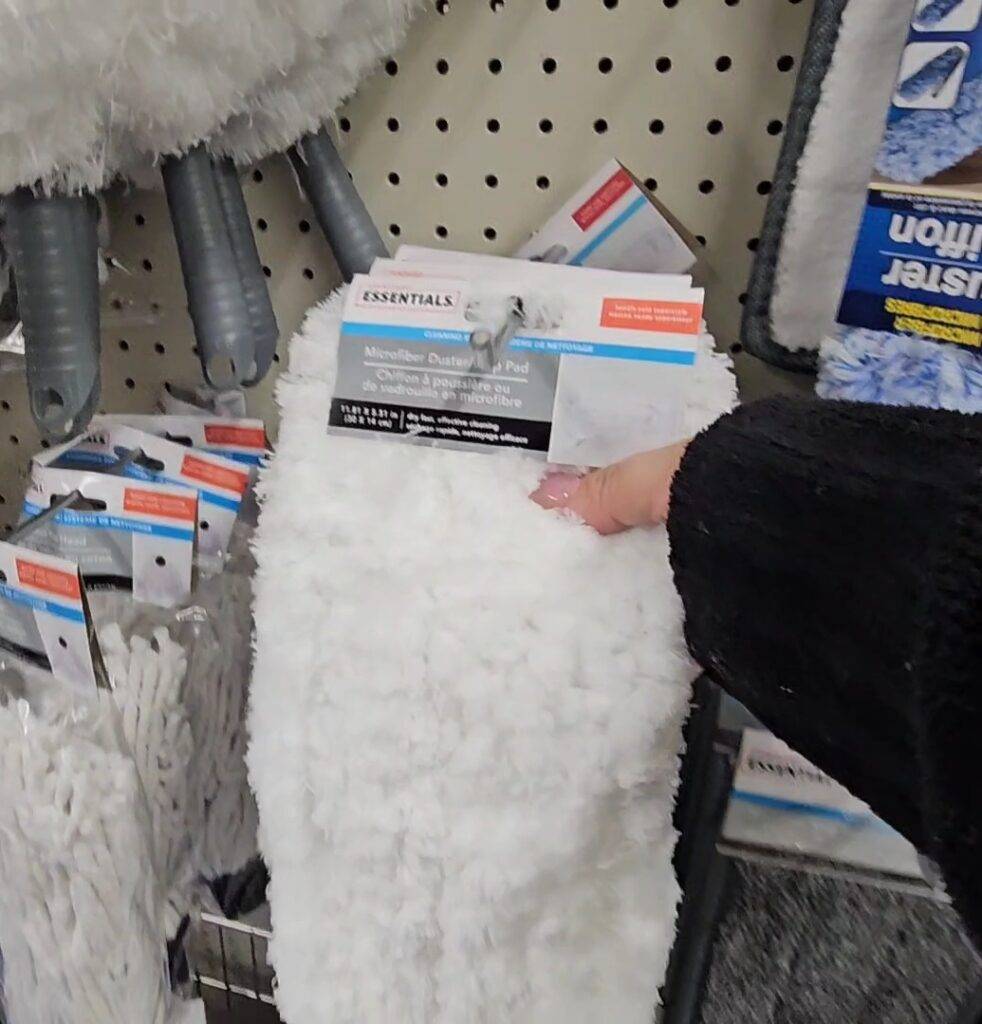
You will also need two of these dusting mops from the dollar store. You can find these in the cleaning isle.
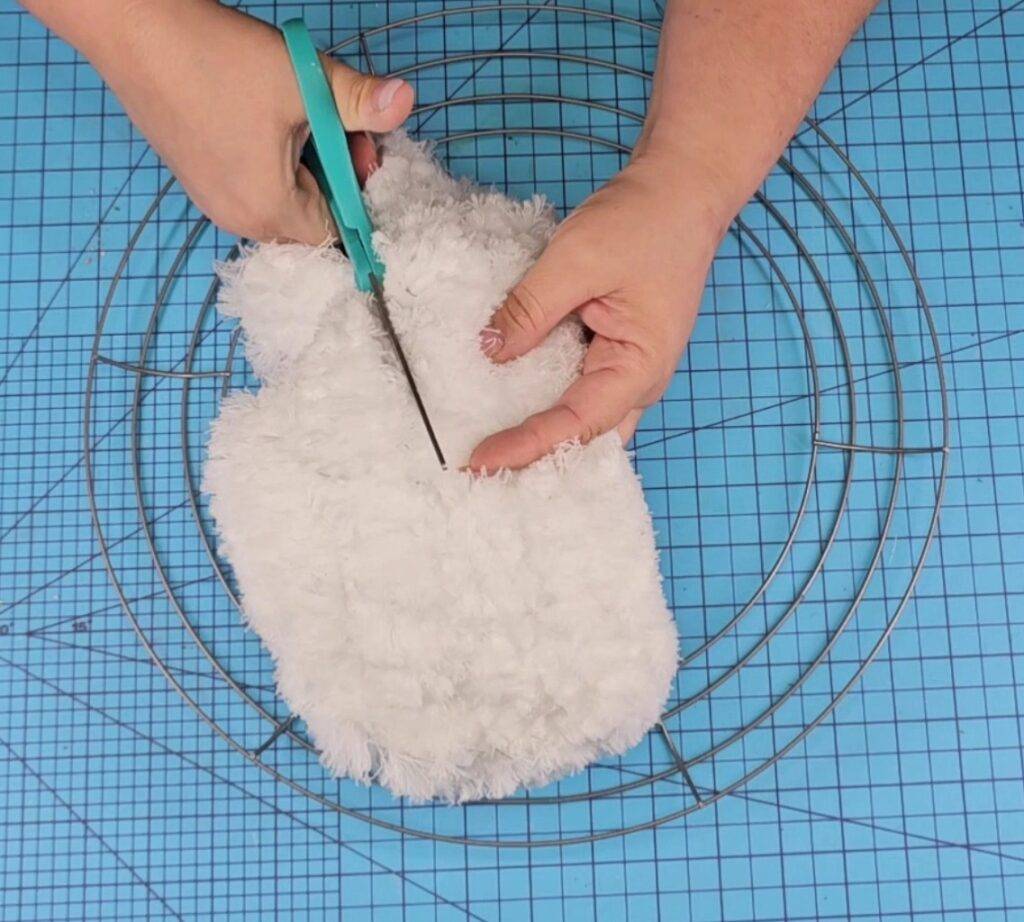
Place one of the wreath forms upside down. Then cut both dusting mops in half, longways. Using fabric scissors works best!
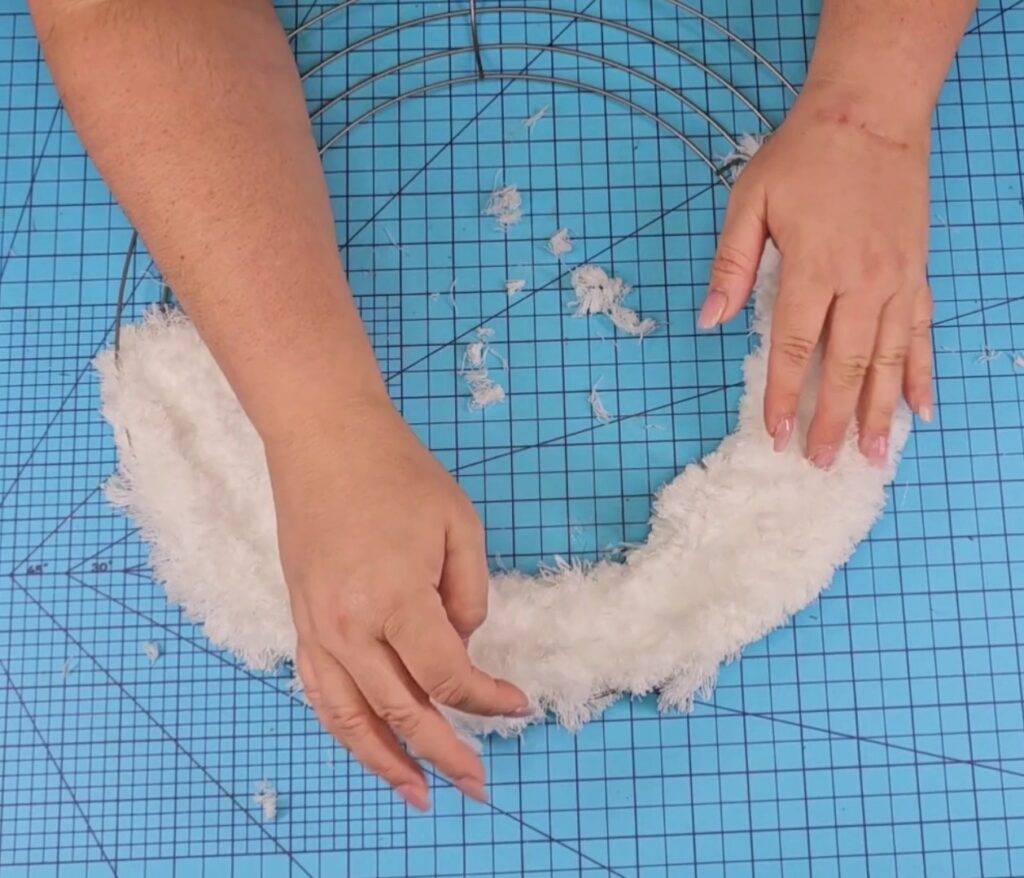
Then place the cut dusting mops inside the wreath form; one at a time. No need to glue them in place, but you can if you want.
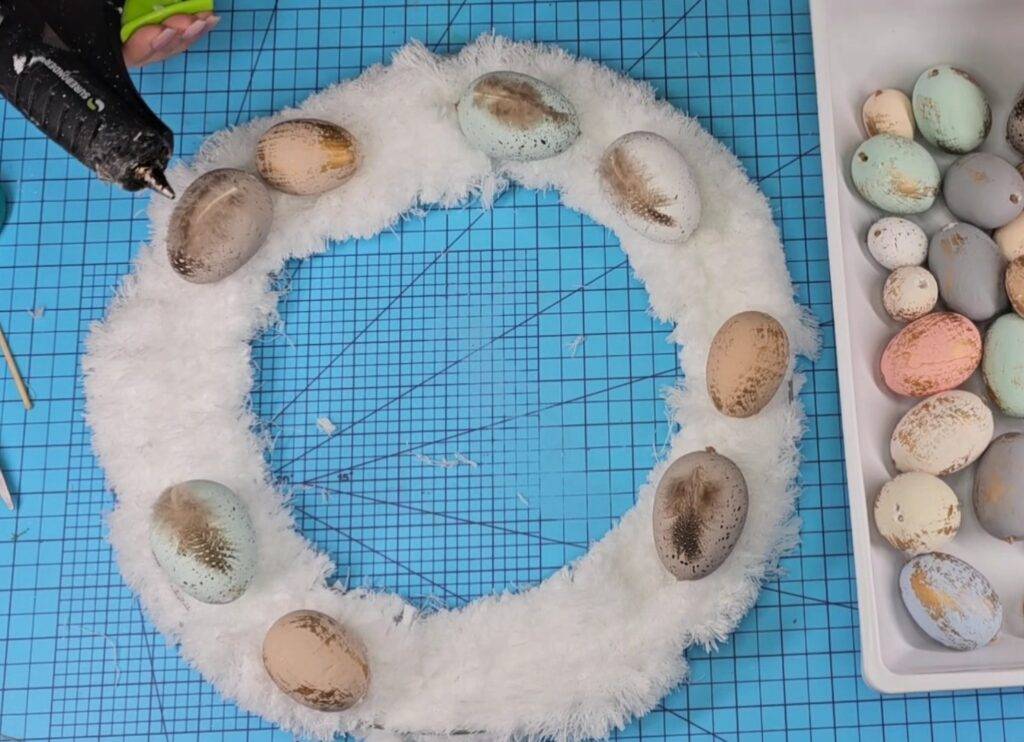
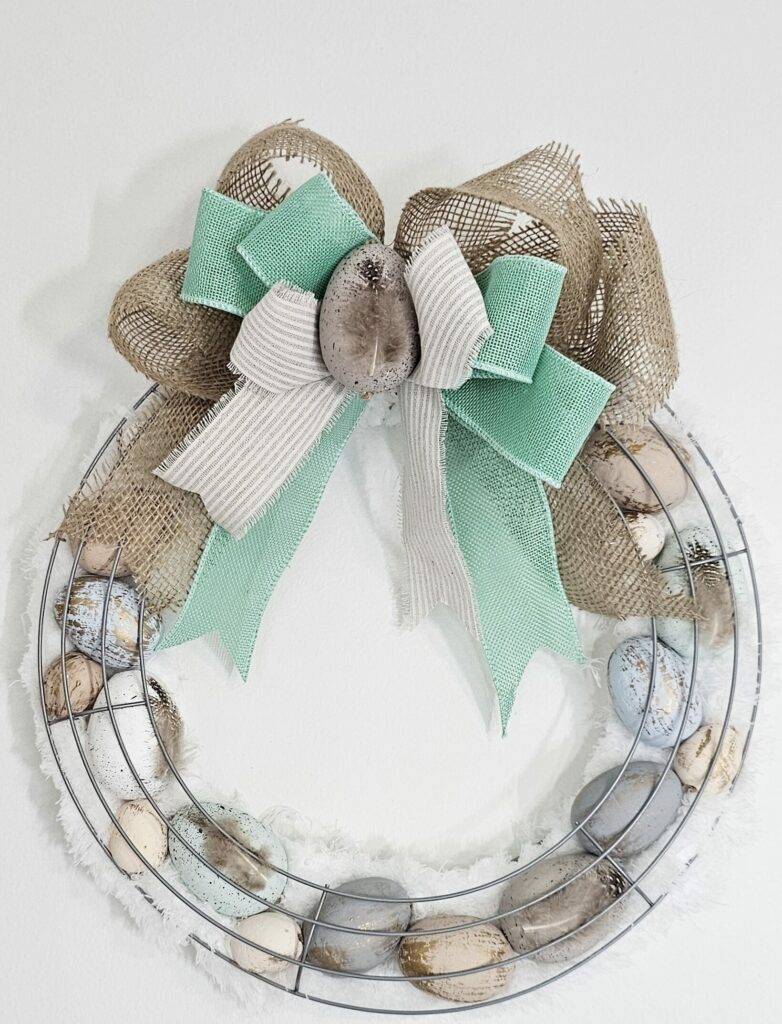
Now you can place foam Easter eggs in the middle for the entire wreath. I used ones from the dollar store but you can also use these from Amazon. Add as many as you’d like, just make sure that they don’t overlap over the edges, stay in the center as close as possible. I used my Surebonder hot glue gun to attach them.
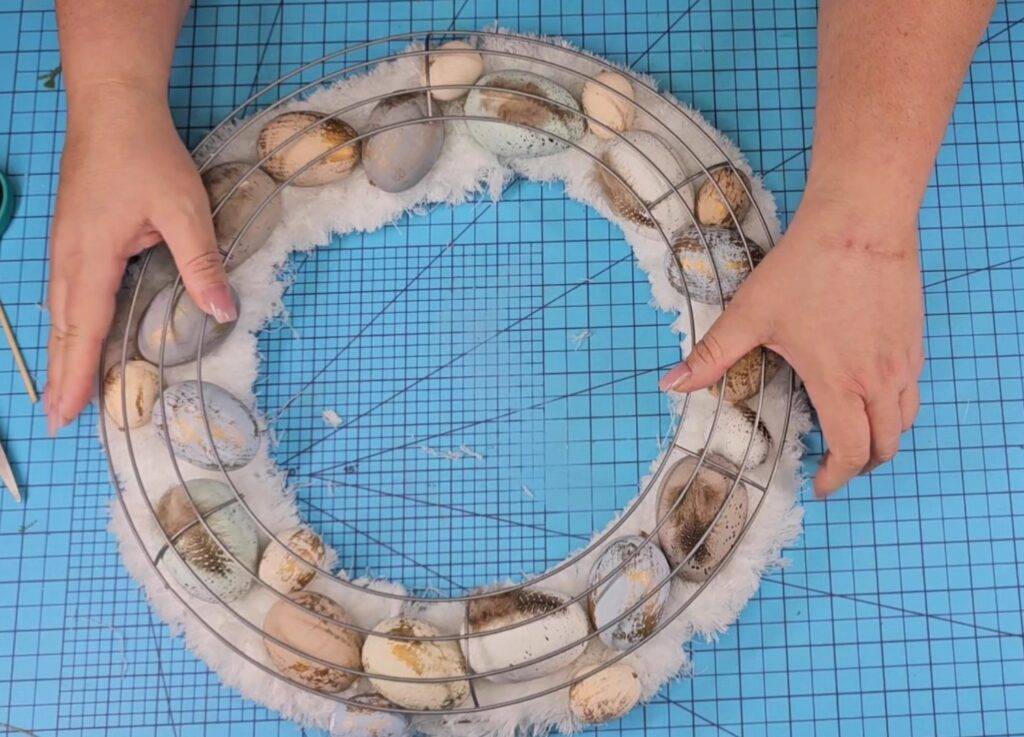
Now place the second wreath form over the top of the eggs. Giving it a “cage-like” look. Make sure the eggs are as much inside the “cage” as possible.
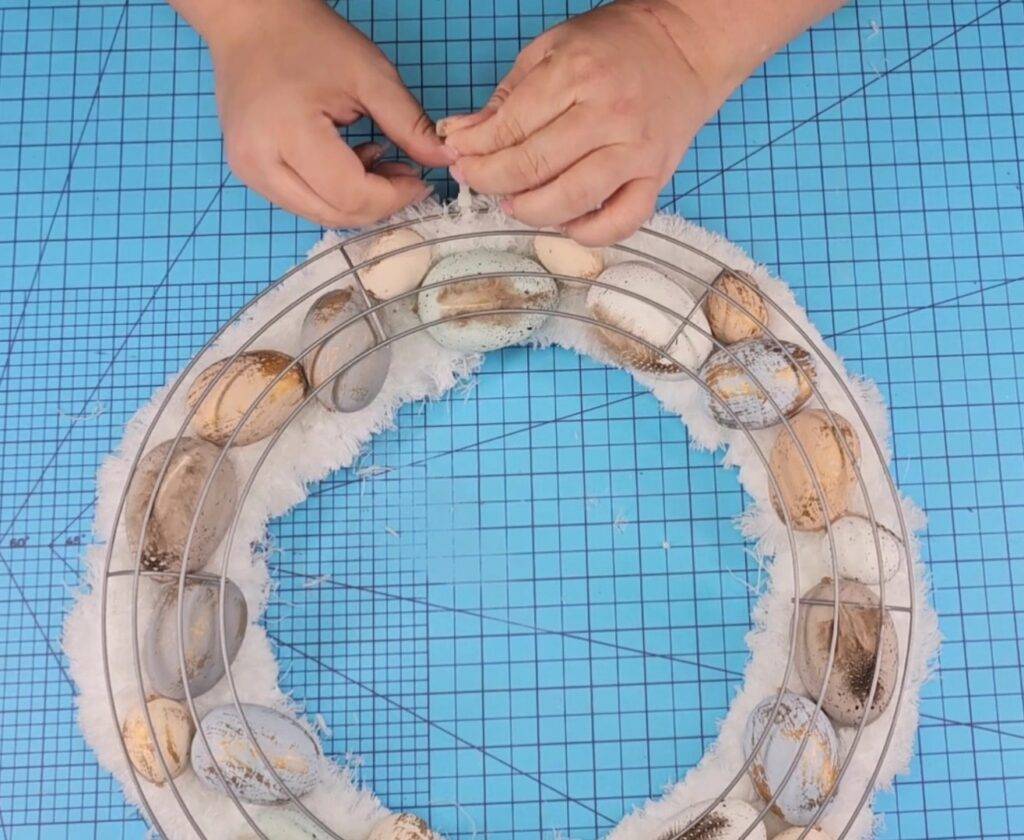
Now add zip ties on the outside of the wreath form. You can use zip ties from the dollar store or these from Amazon. Thread each zip tie through the outside wires of both wreath forms and tighten as needed. You can add as many as you need. I added one on top, bottom on one on each side.
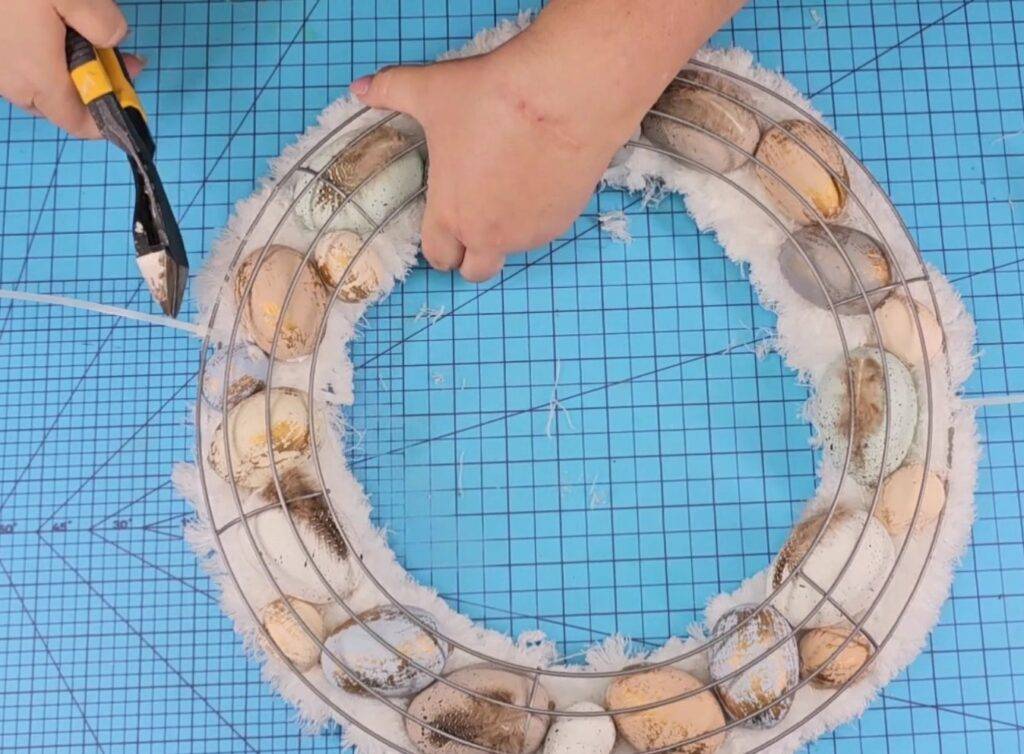
Cut off the excess zip ties with scissors or wire cutters. Scissors work for cut these, but I have found that wire cutters work best.
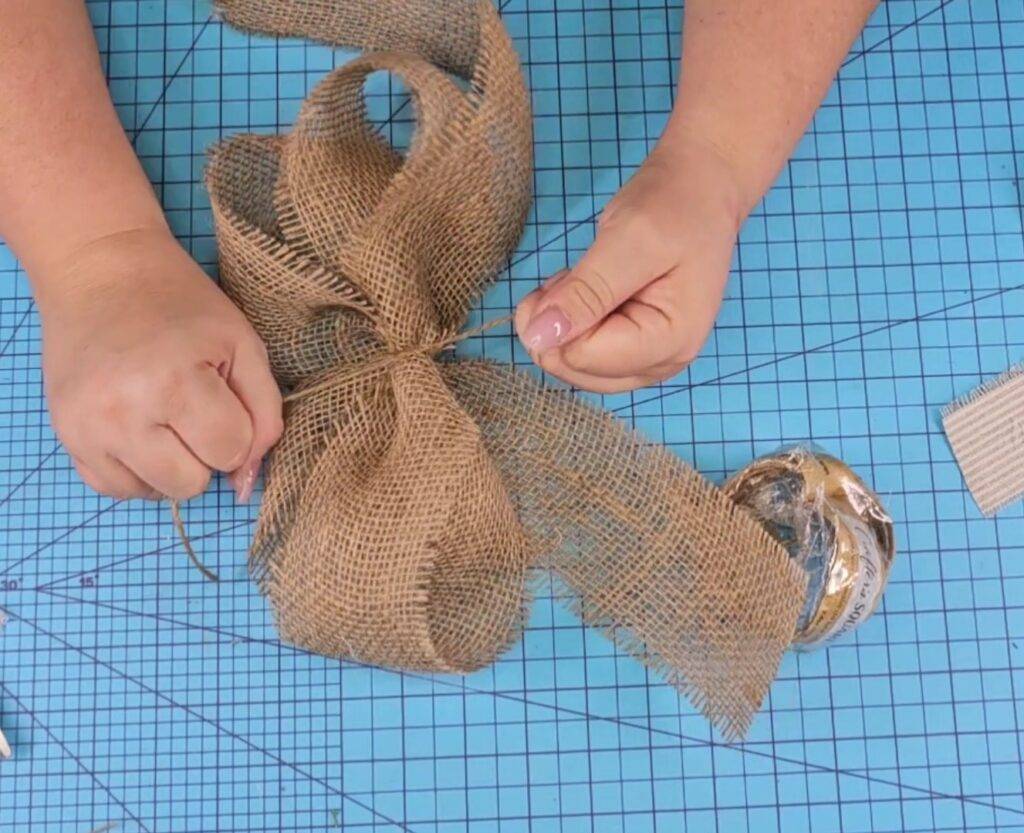

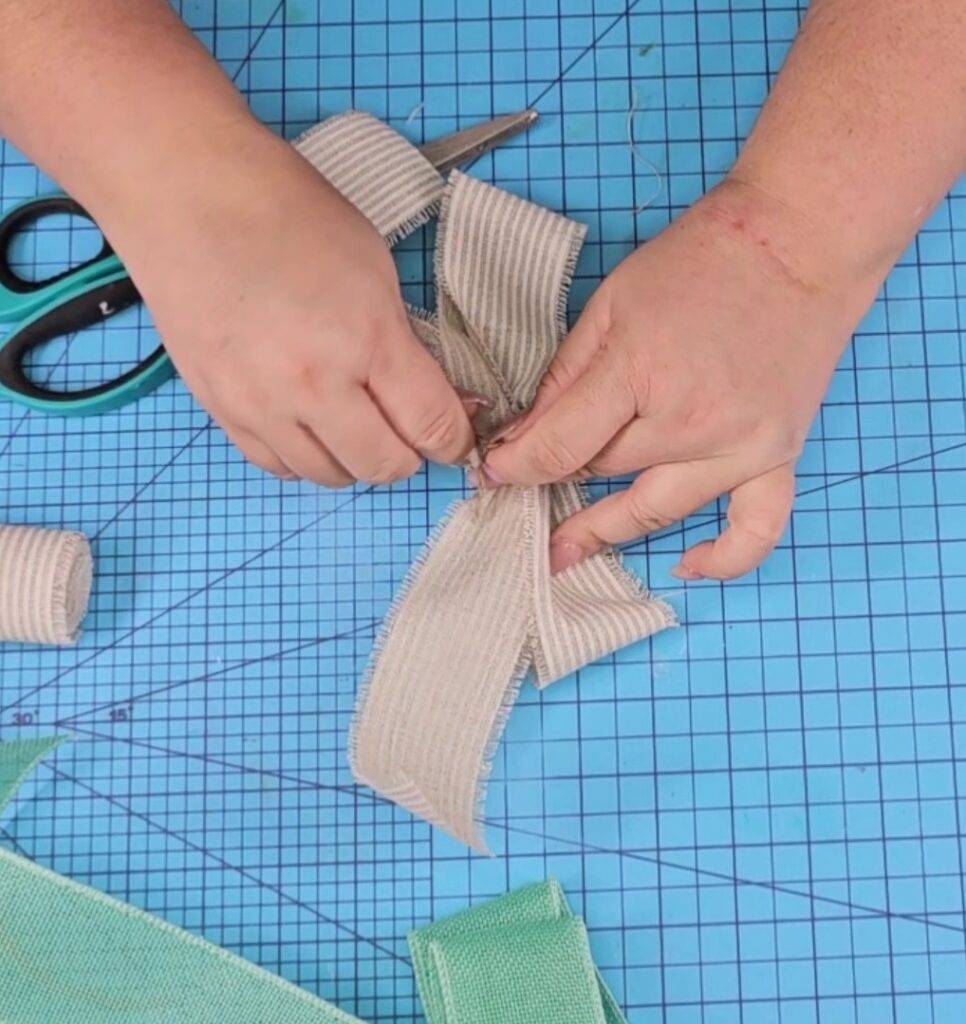
Now let’s make a beautiful bow for the top of the wreath. I made three bows using different ribbons with different designs and colors. You can choose any type of bow you’d like. I made one bow larger than the other and stacked them on top of each other, from largest to smallest.
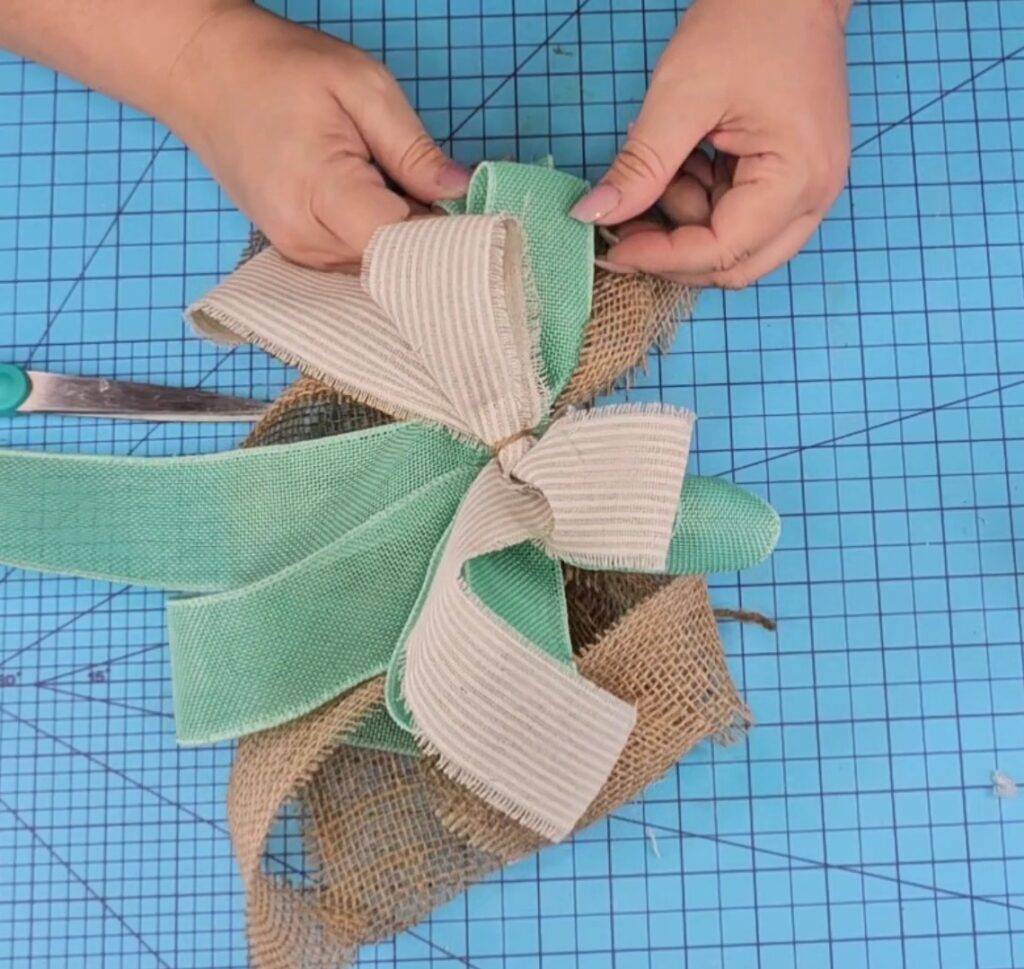
Fluff the bow as needed.
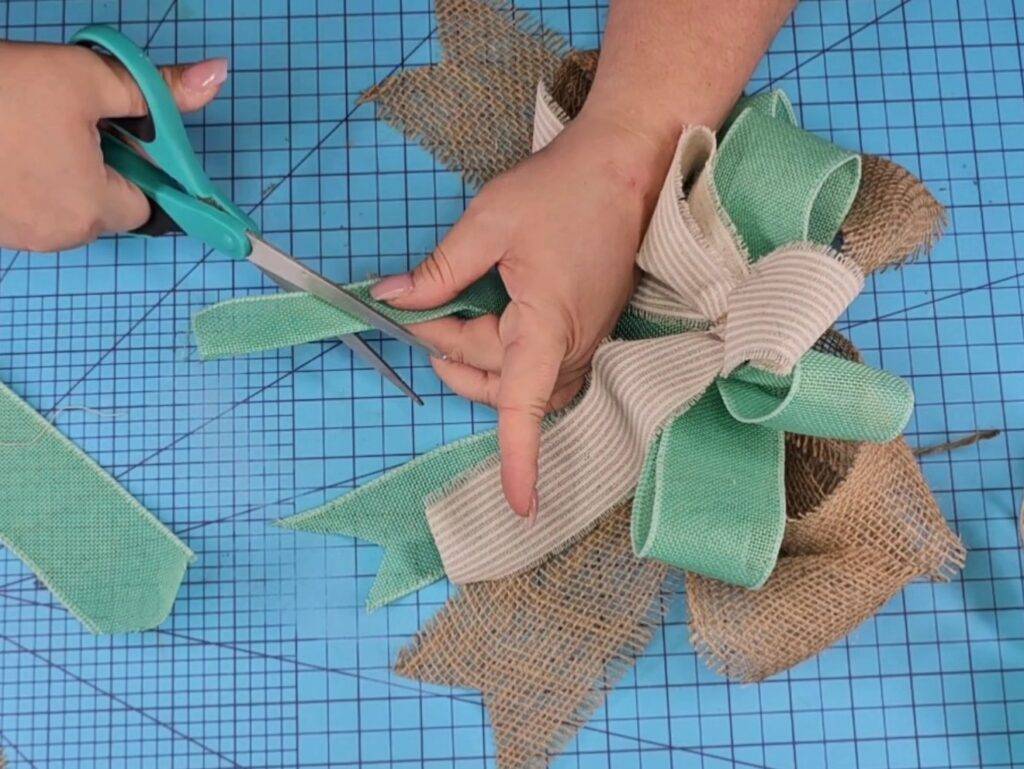
Cut the ends of the ribbon in a “dovetail” shape for a finished look.
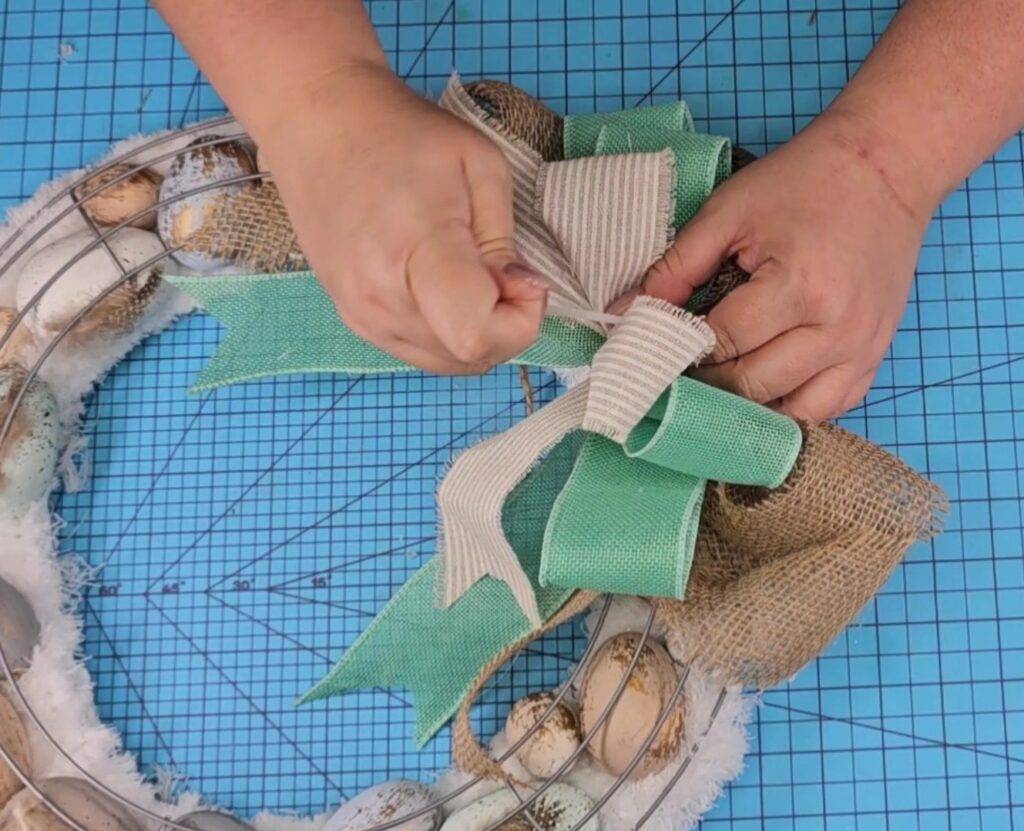
Attach the bow to the top of the wreath using another zip tie and tighten as needed.
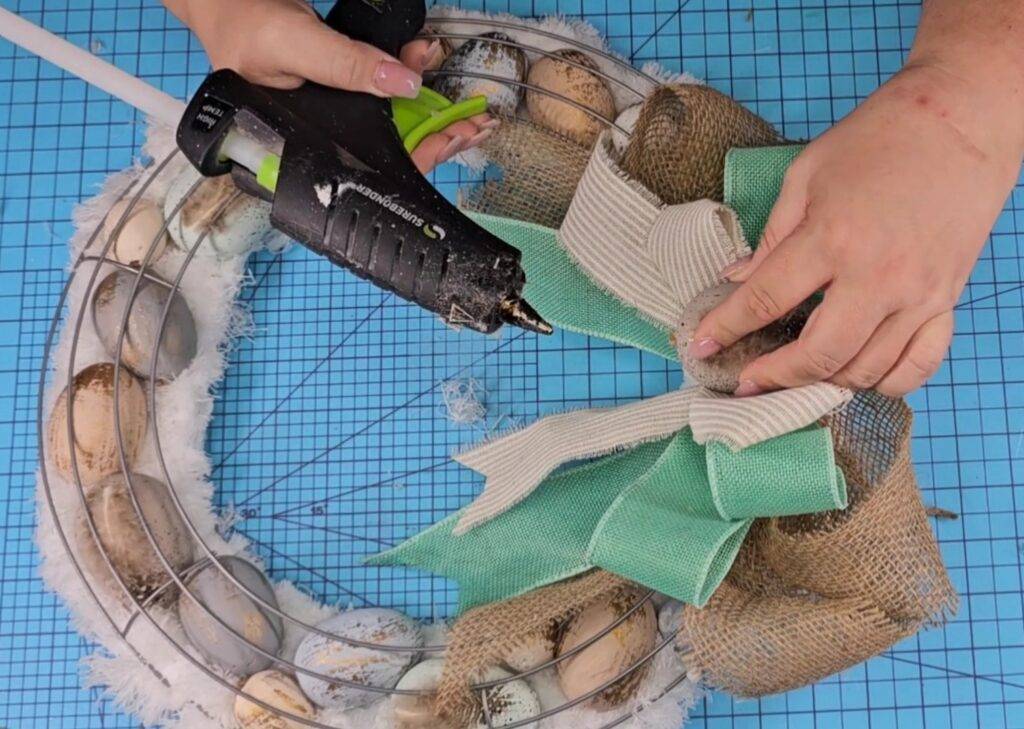
Add one more foam Easter egg to the center of the bow. Or anything you’d like, the possibilities are endless.
That’s it! What do you think? Will you give this Easter wreath a try this season!?
Don’t forget that you can watch the step-by-step video tutorial here below, plus, three additional spring DIY crafts you will LOVE!
Have fun creating this Easter season!
Lianep
If you loved this post, you will love this one too! Click here.
Want to connect on social media? Click here.
** Some links are affiliate links which I earn a small commission on at NO extra cost to you.