With Independence Day just around the corner, it’s time to add a touch of patriotic flair to your home decor! And what better way to do it than by creating a stunning wood round door hanger? In this blog post, I’ll guide you through the process of crafting a real wood round door hanger that captures the spirit of Independence Day. The best part? You can easily customize it using reusable stencils, decorative transfers, and inexpensive florals. Not only will this project be a wonderful addition to your own home, but it also makes for a heartfelt gift or a profitable item to sell.
Wooden door hangers have become increasingly popular due to their versatility and charm. By using a round wooden base, you’ll achieve a unique and eye-catching design that will instantly enhance your front door or any other space in your home. Whether you’re a seasoned DIY enthusiast or just starting out, this project is perfect for all skill levels.
Throughout this blog post, I’ll provide step-by-step instructions and helpful tips to ensure your wood round door hanger turns out absolutely flawless. From selecting the right materials to mastering the art of stenciling and incorporating decorative transfers and inexpensive florals, you’ll have all the tools you need to create a stunning piece of patriotic art that will impress your friends, family, and even potential customers.
Get ready to unleash your creativity, and let’s dive into this exciting DIY project that combines craftsmanship, festive spirit, and the potential for profit!
Here are the materials you’ll need for this fun project! Of course, you can change any color or design for your project. These are just the materials and tools I used to create mine.
1. 18″ by 1″ wood round. You can find the one I used here
2. Red paint and white paint
4. God bless America reusable stencil
6. Faux florals
7. Sign hanging wire with hooks
8. Felt pads
10. Paint brushes
11. Scraping tool
12. Phillips screw driver or drill
13. Sand paper (220 grit) or sander
My first advice for creating a wood round door hanger is to buy a high-quality and durable wood round. I find mine at the hardware stores. They are solid and will last a long time. And if you are planning on making these for profit, buying high-quality wood rounds will ensure you can charge more for them.

Start by sanding smooth the wood round and wiping it well.

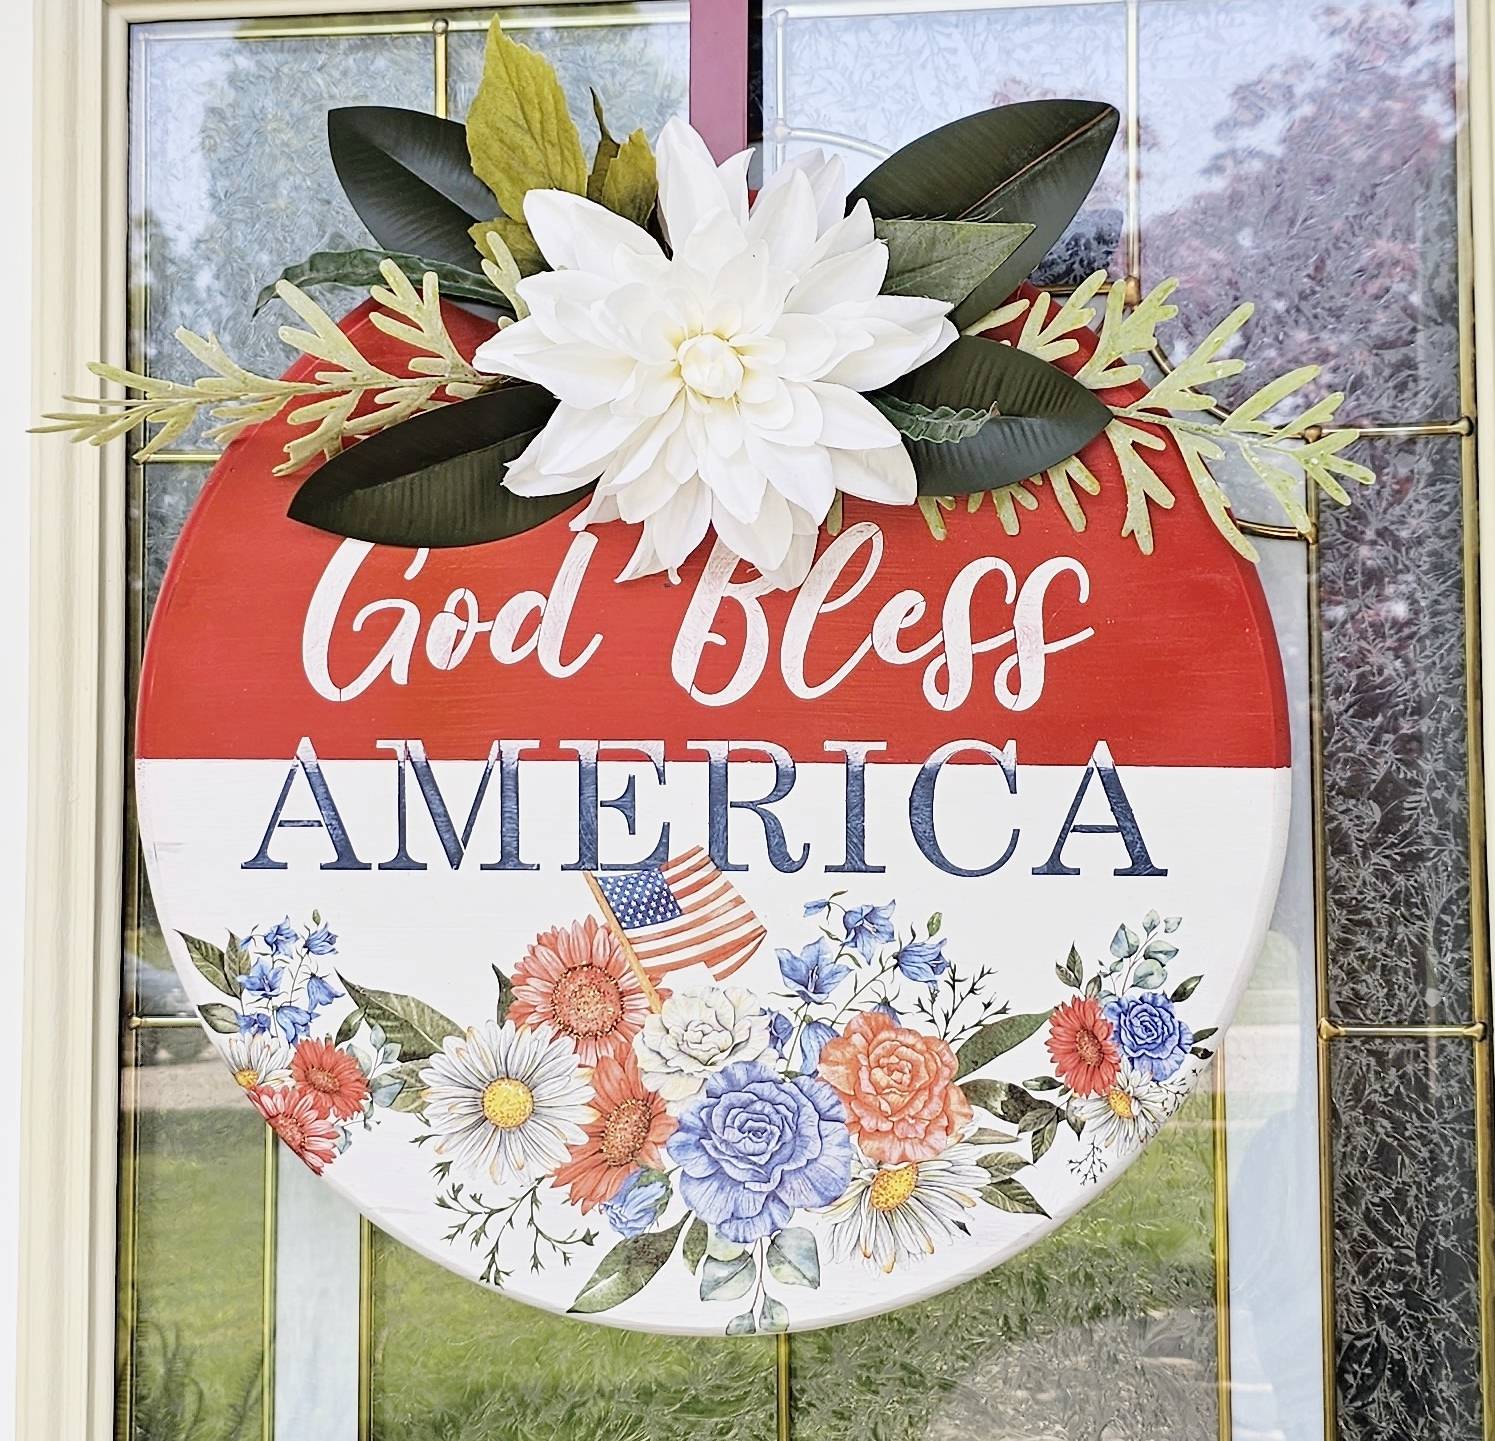
Then, add painter’s tape down the middle, dividing the wood round into two equal size parts. Paint the bottom white, then once dry, place the painter’s tape over the white, aligning it as close as possible to the line, and paint the top red. Let it fully dry.

Take the patriotic themed reusable stencil and place it where the “God bless” is on the red portion and the “America” is on the white portion. Make sure to overlap the “America” a bit over the red line.
Using white paint and a stenciling brush, stencil the “God bless” and the overlapping part of the “America.” Then stencil the rest of the “America” in blue.

Now, it’s time to add the patriotic floral transfer to the bottom portion of the round. You can use another stencil if0 you don’t have a transfer. You can stencil as newded. .
Use a plastic scraper or a credit card to transfer it. Take your time and make sure you are lifting the plastic covering while scraping on the transfer. Add more in the corners to fill in any empty spaces.

Flip the project over and add the hanging hooks, one to each side. Use the screwdriver or the drill to secure them in place. Make sure the sign is facing the way it should, and the design in the front is even.
Thread a washer through one end of the wire first, then thread the wire through one of the hooks and thread again through the washer. Use a nose needle pliers to tighten the washer against the wire. Then repeat on the other side, leaving a bit of a hang on the wire.

Add felt pads to the bottom edge of the wood round. I added four of them evenly spread, but you can add as many as you’d like.
This will help prevent scratching any surface the wood round will rest on.

Now, it’s time to seal everything with the clear spray sealer. And let it fully dry.
This will protect it from the outside elements.

You can now add any florals you’d like to the top portion of the wood round. You can staple them secure and hot glue as needed. You can even add ribbon. The possibilities are endless.
I kept this one with neutral florals to balance out the busy, patriotic design of the wood round.

And that’s it! This patriotic wood round door hanger is the perfect addition to your front door this Independence Day!
You can watch the full, step-by-step video tutorial here below!
Have fun creating and have a beautiful, safe, and fun Independence Day!
Lianep
** Some links are affiliate links, and I earn a small commission from each sale at no extra cost to you.