
$15 Thrift Store Wreath Makeover: From Messy to Magical Christmas Decor
There’s something incredibly satisfying about taking something old, forgotten, and a little rough around the edges — and turning it into a show-stopping piece of Christmas décor. That’s exactly what happened when I stumbled across this poor little wreath at my local thrift store. It was tired, tangled, and honestly, looked like it had seen better days. But for just a few dollars, I saw potential. With a little creativity, a few budget-friendly supplies, and about 20 minutes of work, I was able to give it a total Christmas makeover!
In this post, I’ll walk you through how I transformed a messy thrift store wreath into a festive, elegant decoration perfect for the holidays. I’ll also include a step-by-step video tutorial so you can recreate the look yourself. Whether you’re decorating on a budget or simply love giving old things new life, this thrift store wreath makeover is proof that you don’t need to spend much to create something beautiful. Plus, a simple thrift store wreath makeover is a fun activity to do during the holiday season with friends and family.
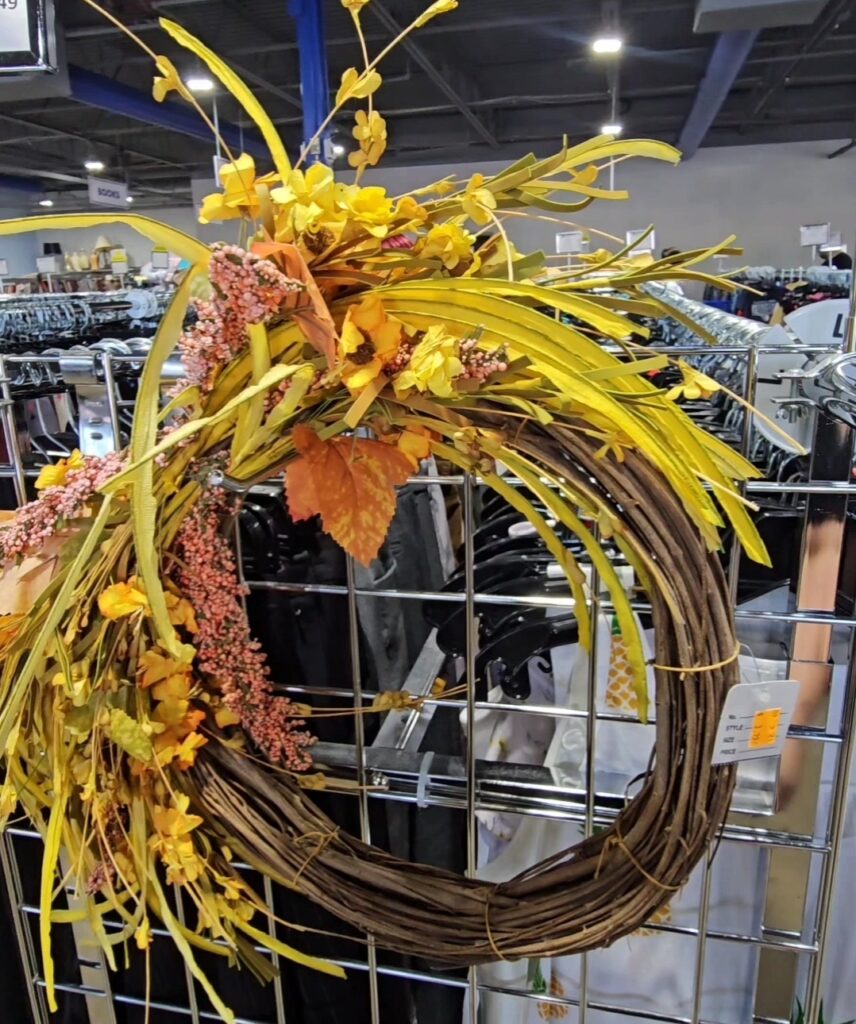
The Before: A Wreath in Distress
Let’s just say — when I first saw this wreath, it wasn’t exactly picture-perfect. The grapevine wreath itself was in great shape, but the florals were smashed and faded. But instead of seeing junk, I saw opportunity. The shape was still intact, and the base was study — which meant I could rebuild on top of it instead of starting from scratch.
I snapped a quick before photo because I knew the transformation would be worth remembering. If you’ve ever walked past something in a thrift store and thought, “That’s beyond saving,” I’m here to tell you — it’s not! Sometimes all it takes is a little imagination and a glue gun.
The Thrift Store Makeover: Simple, Affordable, and Stunning
The best part about this wreath makeover is that it didn’t require much — just a few affordable finds and some creativity. Here’s what I used:
- Old thrifted wreath base
- Evergreen picks
- Green, fabric ribbon
- Hot glue
- Poinsettias
I started by completely removing the original florals, then tucked in evergreen picks I got from Dollar Tree and added three poinsettias in the center. Next, I added ribbon to the top with a bow and a hanging piece to be able to hang it.
Every addition was intentional — nothing over-the-top, just enough to bring the wreath back to life. Within minutes, it started to look like something you’d see in a holiday boutique instead of a thrift bin.
Watch the Transformation
If you’d rather follow along and watch each step in action, I recorded the entire process for you! You can watch the step-by-step video tutorial here
In the video, I’ll show you how I revived the wreath. You’ll see just how easy (and fun!) it is to give any old wreath a Christmas makeover.
The After: Christmas Charm on a Budget
When I hung it up to take the final picture, I was amazed at the difference. It no longer looked like a thrift store reject — it looked like something straight out of a holiday magazine! The mix of old and new gave it a charming, rustic-meets-classic Christmas feel.

What makes this thrift store makeover even better is the price. All in all, I spent under $15 on this entire makeover. Between the thrifted wreath and a few items I already had in my craft stash, it was truly a budget-friendly transformation.
Why You Should Try a Thrift Store Wreath Makeover
Upcycling thrifted holiday décor is not only affordable but also sustainable. You’re giving new life to something that might have ended up in a landfill — and creating something one-of-a-kind in the process. Plus, these kinds of projects help you build confidence in your creativity. Once you start looking at old items with fresh eyes, you’ll be amazed at what you can make!
If you’re ready to get crafty this Christmas, grab a glue gun and head to your local thrift store. There’s treasure waiting to be found — you just have to see the potential beneath the dust and tinsel.
This thrift store wreath makeover reminded me that creativity doesn’t have to be expensive or complicated. Sometimes, it’s the simplest thrift store makeover that bring the most joy. I hope this inspires you to give your own thrifted finds a Christmas makeover!
Don’t forget to check out the before and after photos below, and watch my full step-by-step thrift store wreath makeover video for all the details. If you try this project yourself, tag me on social media — I’d love to see your beautiful wreath transformations!
Check out my YouTube channel for more crafting inspiration!
Learn 13 ways to add beautiful texture to any craft! Click here!
Check out my second YouTube channel with tons of kids crafts inspiration!
Want to connect on social media? Click here!
Want to check out my favorite Amazon Finds? Click HERE!
Have fun crafting and Merry Christmas!
Lianep
** some links are affiliate links which I earn a small commission from at no extra cost to you.